
Making a Metallic-Roughness Map
Return to Main | GIMP index
To understand how a Metallic-Roughness map
works you need to understand the anatomy of a color image.
A color image is effectively at least 3
black and white iamges layered together to create the final image.
One is your red channel, one is your green channel, one is your blue
channel. If your image has transparency then a 4th alpha channel
is used.
While it is standard to just use the 3
color channels to make a full color image, nothing stops a program from
reading each channel individually and using them for different
things. It's common practice to do this in game design when your
material maps are black and white images because that way you can
combine 3 images down into one image which cuts down on file clutter
considerably.
Second life does this with its PBR system
with the metallic roughness map.
Red channel is your ambient occlusion,
Green is roughness, blue is metallicity.
Consider this Metallic-Roughness map I made
for a set of boots by tweaking and adjusting existing textures for
them. Also right-click and save it somewhere and open it in gimp.
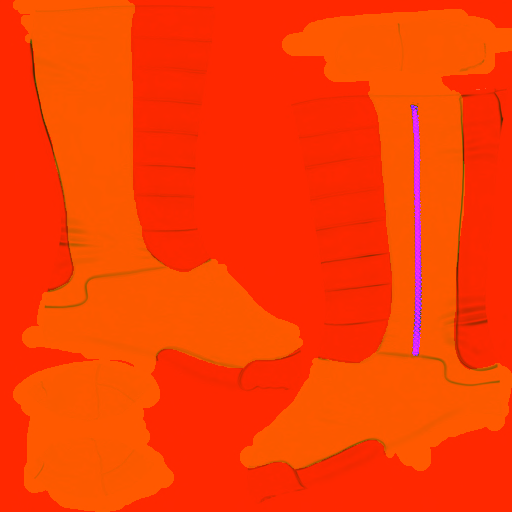
You can kind of see the three different maps
at work here. But let me break down down for you.
See if you were to open this image in GIMP
and click Colors->Components->Decompose you would get an
image with three layers (I
took the liberty of circling the layers section of the GIMP window).
Clicking the eyeball next to each layer can hide it, so by hiding the
"red" layer which holds the AO you can view the "green" layer which is
roughness. and the metallic map under it. This is a real
simple bit of work, while fancier materials often have more varied
roughness then the two-tone approach I took, it ended up looking decent
enough on the boots I was converting from Legacy to PBR.
A lot of SL creators of full perm objects
include an AO or shadow map in their texture pack, either or can be
stuffed in the red slot. If you lack that you can resort to
ripping
the blue channel out of a normal map. Sometimes if you look at
the base legacy texture you can figure a out a way to tweak it into a map
representing shadows and you roll with that. In either case if you
have no AO map to use, then just use pure white.
Most of my homebrew PBR I will often use a
uniform roughness and just stuff white into the green "roughness"
slot. However if you have a specular map you can invert it's color
and tweak it into a roughness map. For the boots I took a simplistic
solution and experimented and found various levels of grey that
represented the level of roughness I wanted at the different parts of the
boot and carefully painted that in using the Pencil Tool, though more
hardcore artists may wish to use more art-friendly programs to make the
raw image, and then take it to GIMP for the final processing. If you
got no roughness map just stuff in white.
Metallicity is usually uniform. These
boots are a special case in that they have a metallic zipper. If you
got a uniform metallicity just stuff in white. It doesn't matter if
the end-product is going to be not-metal, stuff in white. This
allows you to select yes or now later on.
In general when in doubt stuff in
white.
SO! You got your 3 (or less) maps, it's time to grayscale it!
So before we can compose our image we need to
make our three maps grayscale. Gimp doesn't let you compose with
color images, that's like trying to stuff 3 channels into a single
channel. That's a no go.
Even if you have just one map, don't
panic, I've made a ton of nice PBR with only one or two maps. When
in doubt stuff in white.
Here's what you need to do:
- Have all 3 images open in GIMP
- Select the first image you want to prep
- Click Image->Mode->Grayscale
- Repeat for all images if you have more then one.
Once you have prepped your images select the one that you intended to use
for you AO map if you have one. Click
Colors->Components->Compose
If compose is grayed out, that means GIMP didn't see any
grayscale images open in any of its taps, go above and change your
images to grayscale you doof!
So now you got a small floater open. You'll see "Color Model" which
you want to leave on RGB. You will see a Red, Green, and Blue
channel representation option with a dropdown allowing you to select what
goes into each.
REMEMBER: Red = AO, Green = Roughness, Blue = Metallic
For each channel you got an image for, click the dropdown, find it, and
select it.
For each channel you lack an image for, click the dropdown, click "Mask
Value" and leave it at 255, for a vast majority of applications leaving
Mask Value at 255 is the easiest, fastest, and creates less work for you
down the road if you want to change a uniform roughness or metallicity, so
leave it at 255. This lets you use the material floater to adjust
things on the full range of 0 to 1.0 for roughness in metallic for any
blank map.
Once you are set click "Ok". You'll now have a full color image
representing AO, roughness, and Metallicity. Congrats. Click
file->Export to kick that suck-a-duck out in PNG or some other format
SL can upload in (PNG is better then JPG generally because JPG is a lossy
format).